- Cause and Effect
- Concept Wheel
- KWL chart
- Venn diagrams
Friday, November 6, 2009
Graphic Organiser pack (mimio)
Thursday, October 8, 2009
Telescopic Text, Magnetic words and Editing Writing
Start off with Joe Davis's site http://www.telescopictext.com/
I ask students to describe what the tea could taste like, write some answers above the text, then click on the word 'tea'. New text will be inserted into the sentence.
We carry on in this mode predicting, describing and analysing the new edited text until we can go no further.
The next day we can look at this website which is based on Joe Davis's site http://basseq.com/fun/telescopictext/
Now we can add our own words by replacing the text that is already there by highlighting the word to be changed, click on Replace, type new word and then click on Submit changes.
The third day can then be spent looking at Tripticos Word Magnet site.
Type in a sentence. When you type in the full stop make sure there is a space between it and the last word.
Click Next.
 In the next window you can choose from many different backgrounds but for my editing lesson I will keep to a blank page
Click on Done and the next page will appear with your text broken up into text boxes. Click and drag them up to make a sentence.
This is a great way to get students interested in editing their work and to see how a sentence can come alive. These are the type of activities that I like to use with children as part of my modelling and teaching.
This will work well with just a projector and computer, but the Interactive Whiteboard would allow students to take over the manipulation of text and objects.
Smartboards 'Ink Aware' software allows you to edit in Word. So this activity could be carried on in Word, using the Smartboard software that will recognise your ink writing, turn it into text and insert into your sentence. This is demonstrated in the Youtube movie below
Sunday, August 23, 2009
Which IWB?
If I was choosing for Software - Activboard
If I was choosing for Price - Mimio
If I was choosing for interactive features (uses both hands and pens) - Smartboard
I can't ultimately choose one product!
Now, if only somebody could come up with a product that incorporated all three...
Thursday, April 30, 2009
Intelliboard IWB
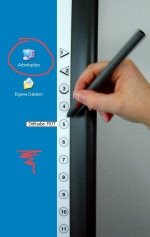
I worked on an 'Intelliboard' IWB today. The Intelliboard software is very basic with only some of the features we see in other IWBs but some of the things we expect like convert ink to text are not there. The basic manipulation of images is cumbersome. Instead of being able to select, resize and move in 3 movements, those changes triple. You need to click on the select button, then select the shape by clicking on it, then go and select another button to resize, go back and click on edge of the shape, then resize, go back and click on movement button, then click on the object and then click and drag...phewwww! Now if you even want to change the outline colour of a shape or fill it with colour, then you just know that is going to take many steps.
There were some features I liked in the software, the automatic recording for each page was good, and the Reveal feature was clean, but the Spotlight was messy and tricky to use and the clipart was limited and very few backgrounds and templates were available.
The board itself though worked fine with other software and the Internet.
The strongest feature of the board was the one click buttons on both sides of the board. You could move from page to page, stop any action you had performed, choose 3 different coloured annotation tools, highlight tool, reveal, spotlight and a screen clipping option. The most bizarre button was the Applause button, click it with the pen and you hear applause over the speakers. There was a button that opened up an Internet page, a button to open the board software 'Intelliboard Whiteboard' and a button to calibrate.
Overall Assessment
As an Interactive board it worked fine, the authoring software was the weakest part of it, the buttons down the side the best feature. I think this board is perfectly adequate for corporate use but schools demand authoring software that enable you to create your own activities with a variety of features. The Intelliboard software does not provide this.
Sunday, March 22, 2009
Using a 'Wii' as an interactive whiteboard
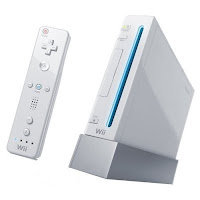 I have been experimenting with a Nintendo 'Wii' to see how I could use it in the classroom I am going to be demo teaching in a week's time. All you need is the Wii console, sensor bar and handset, connect it to a projector and project onto a clear surface (whiteboard) or connect to a TV (then there is no need for a projector). The Wii can connect wirelessly to the internet, so I have been trying out a few websites to see how interactive you can be. It works perfectly! I am writing a maths unit on perimeter and volume for a year 5/6 class and the first site I came across was the BBC skillwise. Once I got used to the controls I decided this would be an excellent student lead group maths activity.
It has fact sheets that the students read through first.
 Then they go to the Quiz site of which there are 3 levels to choose from. My instructions to the students will be to work their way through
 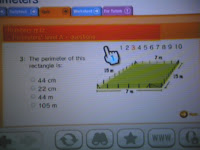 the activities, recording their answers and the process they went through to the get the answer in their maths books at the same time. At the end of each level they will find out the answers so they can correct their work. When they next meet with me for group instruction we will go over the activity together working on any problems or wrong answers they may have encountered.
Save the games you want your students to use by storing them in the Favourites page.

I then tried it out on my PSP and it works well. Save the games to Bookmarks so that they are easy to find. Two students could use a PSP at the same time.
Using game consoles opens up loads of new possibilities for classroom teaching and learning!
The only problem is that I need two projectors in the classroom now!
Thursday, March 19, 2009
A hurdle to get over
 together and they would become a reading activity for students. Do the same with your day to day modelling, save it as your 'Writing Modelling' file, add a few graphics or photos and turn it into a reading activity, or save it as a proof reading activity.
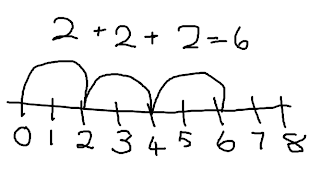
I was in a classroom the other day and saw that the teacher had drawn a numberline on her small whiteboard that was at her teaching station, and written the exercise.
I suggested to her that she create a numberline suitable for her children's level in IWB software, save it to a gallery, and start a numberline file that she could archive and use over and over again (and add to). It is simple enough to create your own numberlines
 (if there is not already one in the clipart libraries, check Mathematics, or check online in the Softwares website) by using the tools that come with the software. Once you have created the numberline, group it so it won't come apart and add it to your Maths Library in your IWB software. Turn on your Grid (usually in the View Menu) to make it more precise.
Thursday, March 5, 2009
Individual photos and Visual Roll
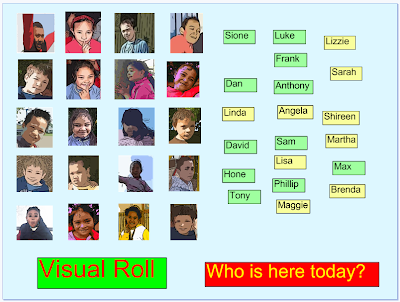
An interactive early morning activity that I read about in 'Dragonsinger's blog is to have all the photos of your children in a grid and their names in another grid. Children as they come into the room in the morning can drag their name and place it on their photo. The names left are the children that are probably away for the day. This is a particularly good activity for young ones as a practice in using the IWB/mimio everyday and sets the routines for the day.
It is a good idea at the beginning of the year to take head and shoulder photos of your students and place them in an easily accessible folder both on your computer and in your IWB/mimio software.
To further extend this idea each photo can have an hyperlink to their own page on a wiki.
Sunday, March 1, 2009
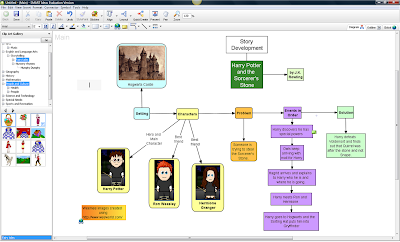
Smartboard concept writing software
Pluses
- easy to add more symbols
- easy to move symbols around
- has a note feature
- uses symbols for hyperlinks and notes
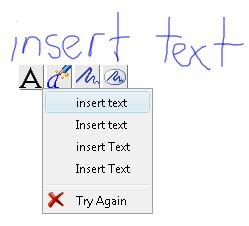
- remembers the changes you made to the symbols (such as colour and shape)
- software is easy to use and navigate around
- the strongest feature for me was the converting of ink to text and inserting into a symbol
Minuses
- less graphics available, can download more from website (Inspiration accesses internet for more)
- can only change colour of symbol outlines (can't adjust thickness)
- doesn't show spelling mistakes
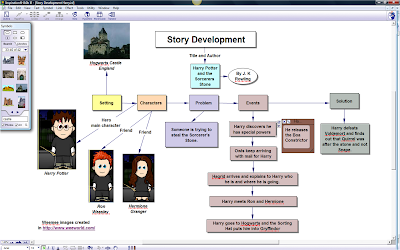
The first example shown below is Smart Ideas and Inspiration below that. Overall I was very impressed with Smart Ideas, so if you have a Smartboard in your classroom, use it for all curriculum areas as I use Inspiration or Kidspiration. Here are some Kidspiration and Inspiration examples. WeeMee Character Graphics created in Weeworld
Tuesday, February 17, 2009
Setting up your mimio and laptop from scratch
Connect projector to laptop, turn on the Projector and the laptop
Stick the mimio to the whiteboard with the suction cups (there are plastic clips available that enable you to have a permanent place on the whiteboard, just clip the mimio into them)
Plug in the wireless receiver
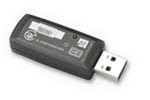 or connect the USB end of mimio to your computer
Press the power button on the mimio

Press the calibration button
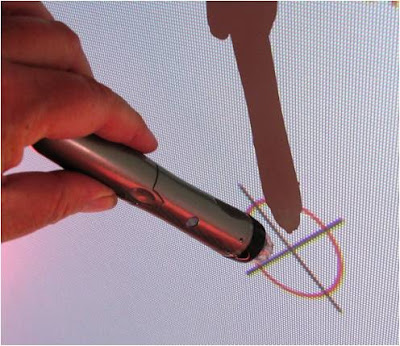

Use the pen to click in the centre of each circle (there are nine)
As long as your projector or screen doesn't move the calibration should stay the same.
Hint #2 pens and batteries again

Check to see if your pen's battery is 'still alive' by pushing the tip, you should hear a buzzing noise. If you hear that, your pen is working! If you hear nothing then change the batteries. Invest in some rechargeable batteries and always have a spare set available for your pen and your mimo. There is nothing worse than going to start your lesson and you have to find batteries before you even begin! Just a note for NZers, if you break the pen a new one is going to cost you NZ$100
Tuesday, February 10, 2009
Things I like about the mimio #1 Converting ink to text
Converting ink to text
Click on the Ink Pen  . Write your text.
  Click on the Selection tool
 . Click and drag around the ink text. It will turn into this
Right click on the selected text and select Recognise Ink or go to Tools in the menu and select Recognise Ink. . The ink is converted into text.
Converting writing to text
Before you start you need to activate your computer keyboard.
Click on the Applications button and select Text tools

A keyboard will appear that you can use with the mimio pen.
Close it by clicking on the . It will appear in your system tray.
Using the mimio pen click on the Text button, click on the page to place the text box.
Right click on the Keyboard  in your system tray. Click on Write Anywhere
 or Writing Pad
  (Write Anywhere is not available on Vista)
If you are using the Write anywhere, you can write anywhere on the screen (make sure the cursor is in the Text box first) when you stop writing it will appear in the text box. If you use the Writing Pad then you have to write on the line in the pad, again every time you stop writing with the pen the ink will convert to text.
What I particularly like the most about Converting Writing to text is that you can use it in other applications as well such as Inspiration, Kidspiration, Word and PowerPoint. Just open the mimio Tools and then the Application you want to use.
Remember it will not work until you place your cursor in a text box, symbol or a page.


